
Microsoft has released information on Windows Autopilot – it is the automation process that was missing when we do cloud only management of Windows 10 devices with Azure Active Directory and Intune.
Some of the benefits of Windows AutoPilot are:
- Intune can push policies, settings, and configuration to the device, and install Office 365 and other apps without IT ever having to touch the device or apply a custom image to the device.
- Intune can configure Windows Update for Business to apply the latest updates.
The device can automatically upgrade from Windows 10 Pro to Windows 10 - Enterprise seamlessly using AAD – no product keys to manage, no reboots, no prompts for the user.(Requires a Windows 10 Enterprise E3 subscription)
New capabilities to Windows AutoPilot that will be added in the Windows 10 Fall Creators Update release later this year include:
- Self-service deployment for Active Directory domain-joined devices – Windows AutoPilot Deployment will enable self-service deployment capabilities to get new Windows 10 devices into an Active Directory domain-joined state along with Microsoft Intune enrollment.
- Enhanced personalization for self-service deployment – Windows AutoPilot will offer the ability to pre-assign a new Windows 10 device to a specific user in your organization and deliver a highly-personalized OOBE.
- Windows AutoPilot Reset – A new reset capability In Windows AutoPilot will enable organizations to easily reset their configured devices while still maintaining MDM enrollment and the Azure AD join state, and automatically get the device back into a business-ready state.
Windows Autopilot has some prerequisites:
- Devices must be registered to the organization
- Devices have to be pre-installed with Windows 10, version 1703 or later
- Devices must have access to the internet
- Azure AD premium P1 or P2
- Microsoft Intune or other MDM services to manage your devices
Devices must be registered to the organization
We need a csv file to import into the Microsoft Partner Center file must contain:
Device Serial Number,Windows Product ID,Hardware Hash
Getting the serial number run this WMI query
wmic bios get serialnumber
Getting the Windows Product ID run this Powershell command
Get-ItemPropertyValue “hklm:\SOFTWARE\Microsoft\Windows NT\CurrentVersion\DefaultProductKey2\” “ProductId”
Getting the Hardware Hash run this WMI query
$wmi = Get-WMIObject -Namespace root/cimv2/mdm/dmmap -Class MDM_DevDetail_Ext01 -Filter “InstanceID=’Ext’ AND ParentID=’./DevDetail'”
$wmi.DeviceHardwareData | Out-File “$($env:COMPUTERNAME).txt”
Then you get a import.csv that look like this:
Device Serial Number,Windows Product ID,Hardware Hash
R9-ZNP67,00329-00000-0003-AA606,T0FzAQEAHAAAAAoA6AOCOgEABgBgW7EdzorHH3g
Devices have to be pre-installed with Windows 10, version 1703 or later
It is working with a clean install of Windows 10 version 1703 as well.
Devices must have access to the internet
With ethernet connected it will skip this part of the OOBE
With wireless – you need to connect to the wireless network
Azure AD premium P1 or P2
Is needed to automatic get the device MDM enrolled as part of the AzureAD joining process.
Microsoft Intune or other MDM services to manage your devices
To manage, configure and deploy application to the device when it is AzureAD joined.
How does Windows Autopilot work:
How to mange it in Microsoft Partner Center
First you have to sign in to the MPC and find the customer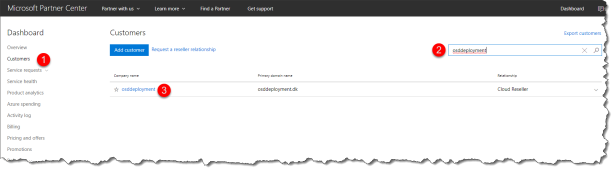
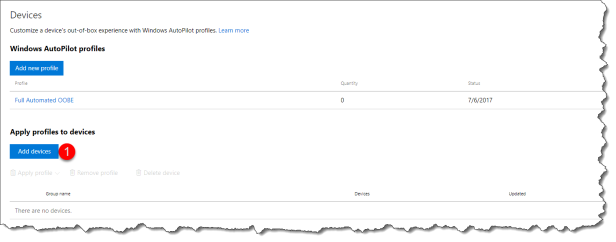
Select Devices
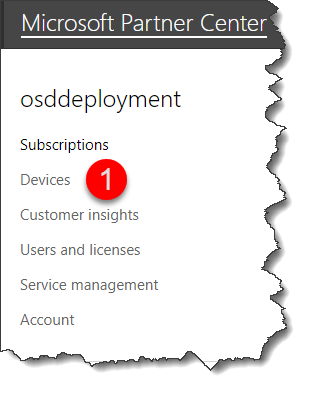
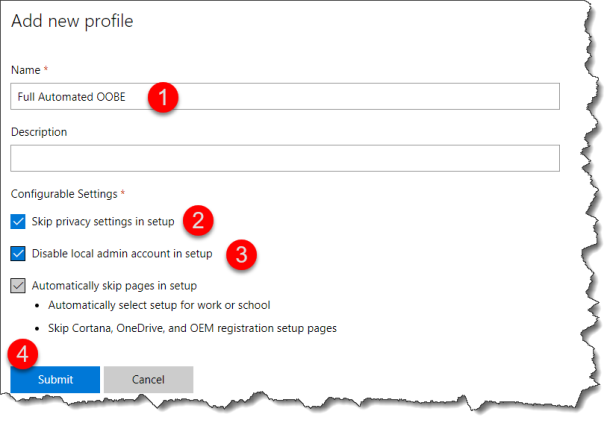
Windows AutoPilot profiles – Add new profile
- Enter a name and maybe a description
- Select “Skip privacy settings in setup”
- Select “Disable local admin account in setup” – if you don’t what the user to be a local admin
- Select Sumit
Apply profiles to devices
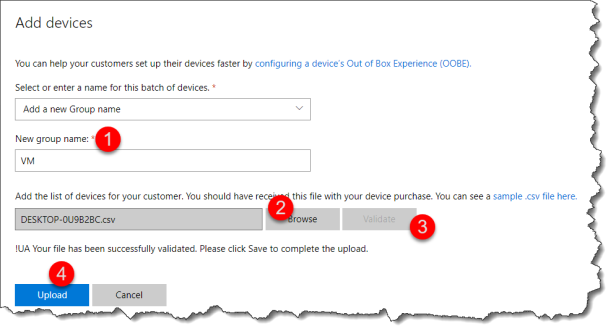
Select Add devices
- Enter the “new group name” of the devices in the import file
- Browse for the import file
- Validate the import file content
- Upload the file
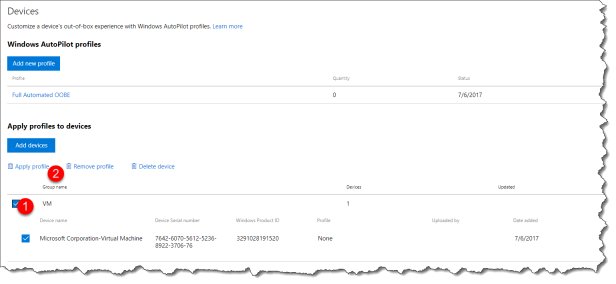
- Select the device
- Apply profile created earlier
Click Yes to assign the profile
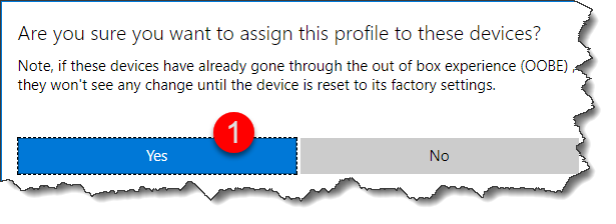
Now the user of the device will be prompted to login to the AzureAD tenant as part of the OOBE.
Who it the user experience of Windows Autopilot
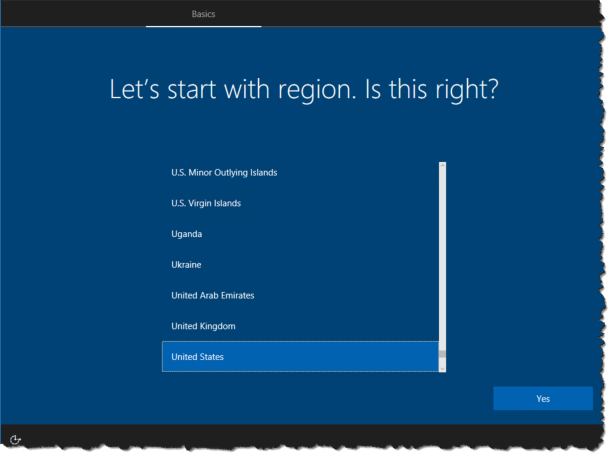
This is first screen that the end-user has to select the region
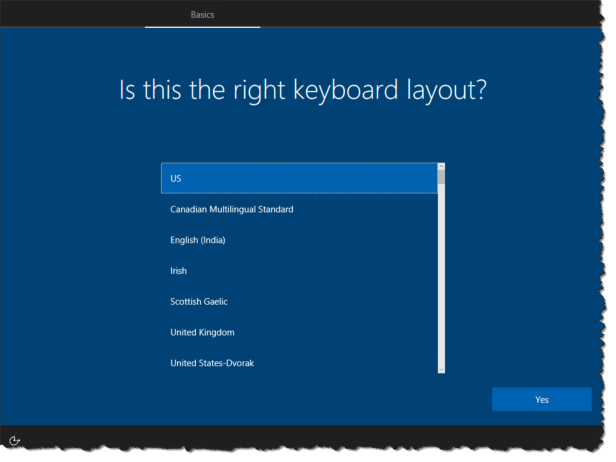
Then the keyboard layout
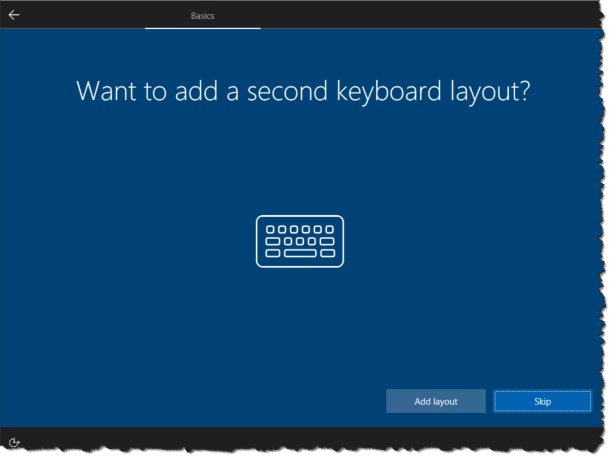
Second keyboard layout
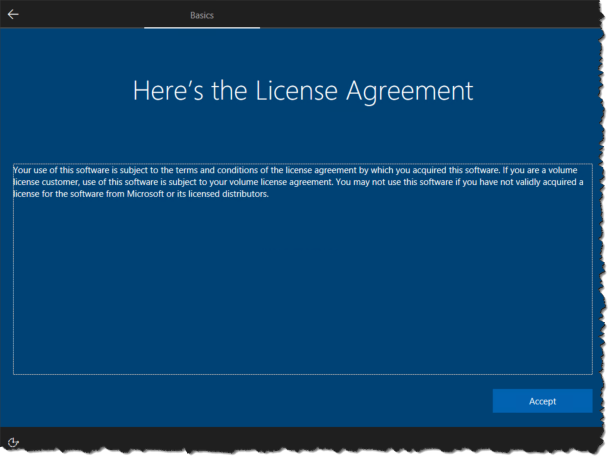
Accept the license agreement
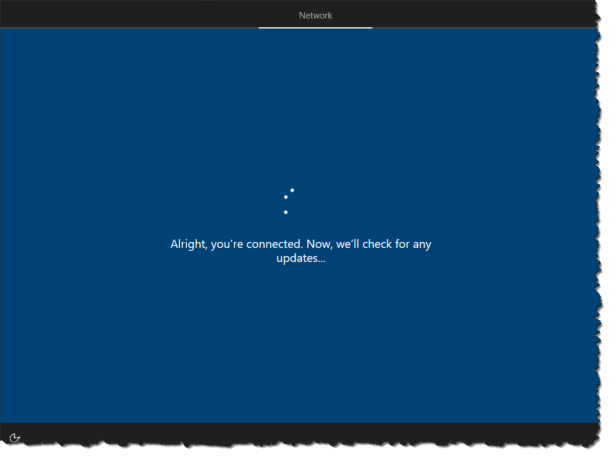
Then Windows will look for network connectivity – if no ethernet is found the end-user will be prompted for wireless settings.
Importen: At this moment the device needs internet connectivity
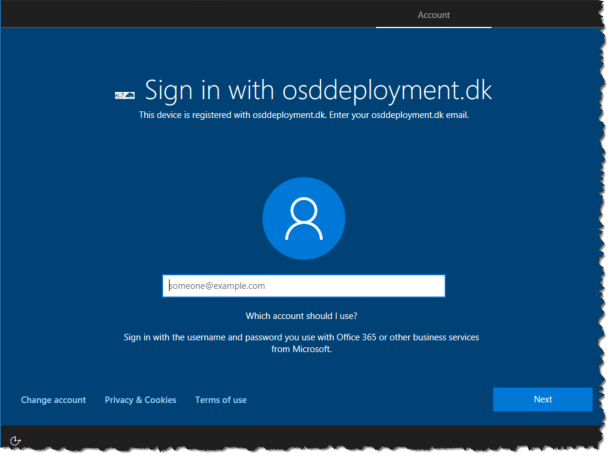
When network connectivity is established Windows will connect to AzureAD to see if it is a “known” devices
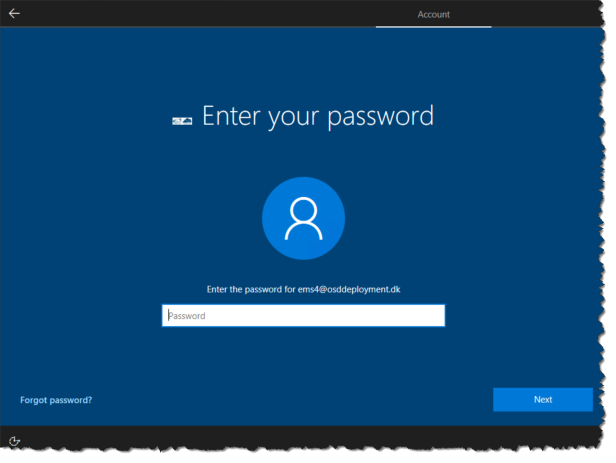
The end-user needs to sign-in with the AzureAD account
Enter the password
When AzureAD joined and automatic MDM enrollemnt is in-place the MDM tool will take over the management of the devices and push down the CSP settings and applications that are assigned to the device.
And then Windows will do a auto login with the user – and the end-user is ready to work.
Non of this process require that the user is in the company internal network.
At the moment Windows Autopilot is only enabled in Microsoft CSP program – and will be enabled in Windows Store for Business (WSfB) and then I will update this blogpost.
Read more about Windows Autopilot at:


Hi! In Microsoft Partner Center I can create WIndows AutoPilot Profiles for my clients, but not for my own company?
That is correct as far as I know – you cannot sell CSP license to your own company
Great blog post. Thanks for the info.
Curious if you ran into the scenario where you the hardware hash is empty even though the machine is activated. I have tried 4 Windows 10 devices from Surface Book, Dell and Samsung. The WMI fields shown above are all empty.
No – it has worked for me every time. Are you running the WMI query as admin?
Great write up. So does that mean, you would not use custom images to deploy (streaming +4GB wouldn’t make this a very viable option)? Is this more targeted at SMB then? I guess not since the license is for Windows 10 Enterprise E3. Not terribly much info out there… Thanks.
You can do Windows AutoPilot with or without imaging. I have done it in both scenarios, but if you are using imaging you need to kick off the OOBE process at the end of your image.
I believe that it is for any one that are using AzureAD and MDM to manage Windows 10.
The Windows Enterprise E3 is not a requirement for Windows Autopilot – unless you want the automatic upgrade to Enterprise.
I looking forward to see what Microsoft’s plans are on AutoPilot for onprem AD with Windows 10 Fall Creators Update.
Thank you so much for your helpful response! That makes sense. Yes, I am excited to see what Microsoft’s whole Modern IT agenda will bring. Interesting times for sure. 🙂
So, for the workflow of testing this process, you would still have to boot up each device with WinPE, collect the hardware data and have it append to a CSV, shut down the machine, import the CSV, make sure it syncs up and populates the hardware, assign the hardware to a profile, and send it to the end user?
Yes until you can get the information from the OEM vendor
How did you get you “company” name on the sign in page?
Customize a device’s out-of-box experience with Windows Autopilot profiles is not possible at the moment in the MPC for CSP, because the Add devices button ist missing.
Is it not possible anymore to do add it that way as described?
https://docs.microsoft.com/de-de/partner-center/autopilot#add-devices-to-a-customers-account
Anyone have luck with LG devices? What is the correct notation for manufacturer and model?